After 15 years of pulling apart hybrid battery packs across the Tri-State area, I’ve noticed something that frustrates me every single week: most “diagnostics” being sold to hybrid owners aren’t really diagnostics at all.
They’re code scans dressed up in technical language. There’s a meaningful difference, and it’s the difference between a $200 module repair and a $4,000 replacement you didn’t actually need.
So let’s pull the curtain back. This is what a real hybrid battery diagnostic looks like, what each step actually measures, and how to tell when a shop is genuinely investigating versus just guessing with expensive tools.
Why a Code Scan ≠ a Diagnostic
Walk into most repair shops with a “Check Hybrid System” light on, and here’s what happens:
- A technician plugs in an OBD-II scanner
- A code like P0A80 (“Replace Hybrid Battery Pack”) pops up
- You’re quoted for a full battery replacement
That’s not a diagnostic. That’s reading. A real diagnostic asks the next question: why is that code triggering?
In my experience, P0A80 is right about 60-70% of the time. The other 30-40%? It’s a weak 12V auxiliary battery, a corroded bus bar, a bad cooling fan, a single failing module out of 28, or a sensor giving false data. None of those require a new battery pack. All of them get misdiagnosed every day.
A proper hybrid battery inspection is a sequence — a layered process where each step validates or invalidates the last. Skip a layer, and you’re guessing.
The 7-Layer Diagnostic Sequence I Follow on Every Pack
Here’s the exact order my team works through. Order matters more than people realize, because skipping ahead leads to false conclusions.
1. The 12V Auxiliary Battery Check (The Step Everyone Skips)
Before anyone touches the high-voltage pack, I check the 12V battery. Always. Here’s why:
- The 12V battery powers the Battery Management System (BMS), the relays, and the boot-up sequence
- A weak 12V battery causes false hybrid battery codes more often than people realize
- Symptoms overlap almost completely — slow start, dashboard warnings, intermittent power loss
I’ve personally watched customers get quoted $3,500 replacements when their actual problem was a $180 12V battery. If your shop doesn’t test the 12V first, walk out.
What I’m measuring: Resting voltage (should be 12.4V+), cranking voltage under load (should hold above 9.6V), and CCA capacity against the spec.
2. Diagnostic Trouble Code (DTC) Pull — From All Three ECUs
A standard scanner reads the engine ECU. That’s not enough. A hybrid has at least three modules I need to interrogate:
- Hybrid Vehicle Control ECU — the brain coordinating gas + electric
- Battery ECU — manages individual module behavior
- Engine Control ECU — monitors combustion side
I pull codes from all three using a hybrid-specific scan tool (think Techstream for Toyota/Lexus, Consult for Nissan, or equivalent professional-grade software). Generic OBD-II readers literally cannot see most of the codes that matter.
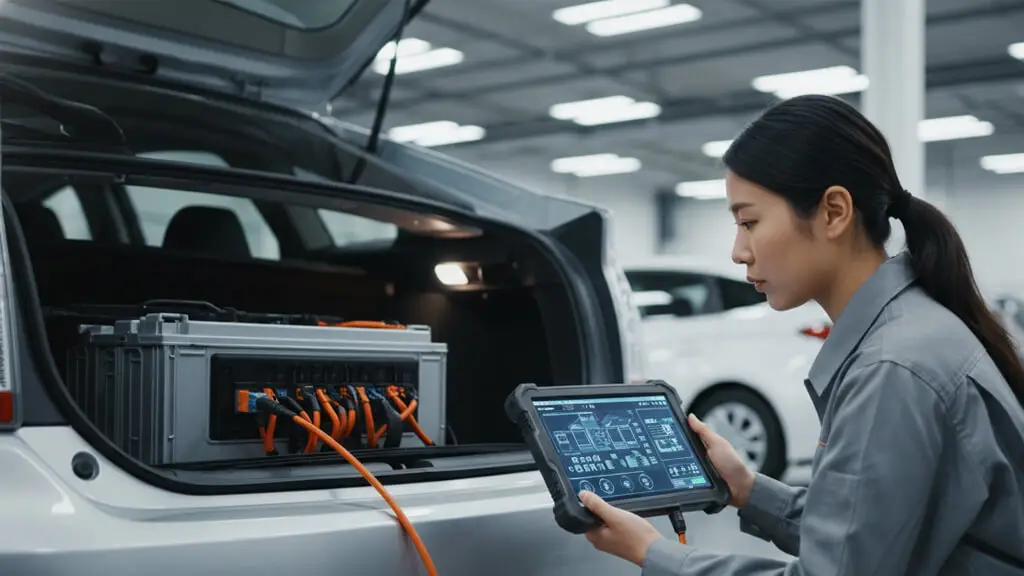
3. State of Charge (SOC) and State of Health (SOH) Reading
These two numbers tell the real story:
- State of Charge (SOC): How much usable energy is in the pack right now (typically 40-80% in a Toyota hybrid by design — the BMS protects the battery by never letting it go fully empty or fully full)
- State of Health (SOH): Current capacity vs. when the pack was new — this is the number that tells me if reconditioning is even an option
If SOH is above 70%, reconditioning is almost always viable. Below 50%, I’m having an honest conversation with the customer about replacement.
4. Individual Module Voltage Mapping
This is where most generic shops simply cannot follow. A typical NiMH hybrid pack has 28 modules wired in series. I read each one individually under three conditions:
- At rest (after the car has sat overnight)
- Under charge (regenerative braking simulation)
- Under discharge (acceleration load)
What I’m hunting for:
- A healthy pair of cells should sit around 15.0V at rest
- A failing module will drift below 14.5V or behave erratically under load
- The delta voltage — the spread between the strongest and weakest module — should ideally be under 0.2V
I’ve seen packs where 27 modules were perfect and one module was failing. That’s a $200 fix, not a $4,000 one.
5. Internal Resistance Testing
Voltage alone doesn’t tell you everything. A module can show “okay” voltage at rest but collapse the moment current flows through it. That’s high internal resistance — the silent killer of NiMH packs.
- Healthy NiMH module internal resistance: under 30 mΩ
- Aging but functional: 30-50 mΩ
- Failing: above 50 mΩ
Internal resistance is what causes the “fluctuating SOC gauge” symptom — the one where your battery icon swings from full to empty in seconds. The pack isn’t actually losing charge that fast. The high-resistance modules are sagging under load and confusing the BMS.
6. Load Test (Active Discharge Under Controlled Conditions)
This is the test that separates real diagnostic shops from pretenders. I put the pack under a controlled high-power discharge — typically simulating around 10kW of load — and watch how every module behaves in real time.
What this reveals that nothing else can:
- Modules that are fine at low load but collapse at high load
- Thermal runaway tendencies (modules that heat unevenly)
- Capacity mismatch between modules even when voltage looks balanced
A pack can pass every static test and fail this one. That’s why it matters.
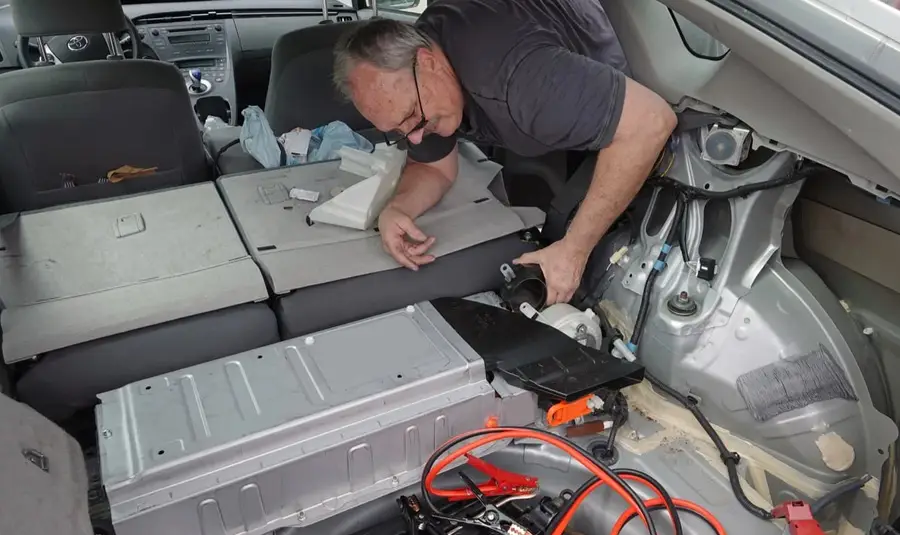
7. Cooling System and Physical Inspection
Last but absolutely not optional. I open the pack and look at:
- Cooling fan operation — clogged or failing fans cook batteries from the inside out
- Bus bars and connections — corrosion here causes voltage drops that mimic module failure
- Wiring harness integrity — loose connections from vibration are surprisingly common
- Visible cell damage — leakage, swelling, heat discoloration
A surprising number of “battery failures” are actually cooling failures. Fix the airflow, and the battery comes back to life on its own.
How to Tell If You’re Getting a Real Diagnostic
If you’re calling around for a hybrid battery diagnostic, here are the questions I’d ask any shop before booking:
- Do you test the 12V battery first? (If no, walk away)
- Do you read individual module voltages, or just the pack total? (Pack total tells you almost nothing)
- Do you measure internal resistance per module? (This is non-negotiable for NiMH)
- Do you provide a written report with the actual numbers? (You should leave with data, not just a verdict)
- What’s your replace-vs-recondition ratio? (Shops that replace 100% of packs are upselling)
A trustworthy shop will answer these without hesitation. A shop that gets defensive is telling you everything you need to know.
What the Numbers Should Look Like (Cheat Sheet)
For a Toyota/Lexus NiMH pack — the most common setup on the road today — here’s what I’d consider healthy:
- Pack voltage at rest: 200-240V (depending on SOC)
- Module voltage at rest: ~15.0V (each pair)
- Delta voltage between modules: under 0.2V
- Internal resistance: under 30 mΩ
- SOH: above 70% for reconditioning candidacy
- Temperature delta across pack: under 5°C
If your numbers are drifting outside these ranges but not catastrophically off, you’re a reconditioning candidate — not a replacement candidate. That’s usually a $1,200-$1,800 outcome instead of a $3,500-$6,000 one.
The Lithium-Ion Difference (Briefly)
Newer hybrids — most plug-ins and many post-2018 vehicles — use lithium-ion instead of NiMH. The diagnostic principles are the same, but the numbers shift:
- Lithium-ion module voltage: typically 3.6-4.2V per cell
- Internal resistance threshold: much lower, usually under 5 mΩ for healthy cells
- Thermal sensitivity: much higher — temperature monitoring becomes critical, not just helpful
Lithium packs also fail differently. NiMH gives you warning signs for months. Lithium can go from “fine” to “hard fault” in days when a cell goes bad. That’s why proactive hybrid battery inspection matters even more on these newer platforms.
When Diagnostics Reveal Reconditioning Is the Right Call
Here’s the threshold I use after running the full sequence:
Recondition when:
- SOH is between 60-85%
- Fewer than 4-5 modules out of 28 are weak
- Internal resistance is elevated but not extreme
- No physical damage to cells or housing
- Cooling system is functional or repairable
Replace when:
- SOH is below 50%
- More than a third of modules are failing
- Visible cell damage, leakage, or swelling
- Pack has been overheated severely (telltale brown discoloration)
About 70-75% of the packs that come through our facility are reconditioning candidates. Most of those packs were quoted as full replacements somewhere else first. That gap — between what’s possible and what gets recommended — is the entire reason this work matters.
Final Thoughts
A hybrid battery diagnostic isn’t a single test. It’s a layered investigation, and the quality of the diagnosis directly determines whether you spend $1,500 or $5,500 on the same problem. The tools matter, but the sequence matters more, and the willingness to question the first answer matters most of all.
If your hybrid is showing warning signs — sluggish acceleration, dropping fuel economy, erratic battery gauge, or a “Check Hybrid System” light — don’t accept the first quote that comes back. Ask for the numbers. Ask for the module-level data. Ask whether reconditioning was even considered.
At AloyHybrid, every pack that comes in goes through this exact sequence before anyone discusses cost. Sometimes that means we save the customer thousands. Sometimes it means we confirm a replacement is genuinely needed. Either way, the answer is built on data — not on the easiest upsell.
That’s what a real diagnostic should be.